
How to Draw Toothless Easily
How to Draw Toothless. The How to Train Your Dragon series is one of the most fascinating and unique animated film series in recent years.
Also, check our Easy Tiger Coloring Pages.
Based on a popular book, the series offers many exciting adventures with wonderful characters.
The real stars of the series are the dragons featured in the films, and the most famous is the Toothless Dragon.
This dragon is characterized by its unique design and playful personality. Learning to draw Toothless is a great way to express your love for this character!
If you’re one of their many fans, this tutorial will surely be necessary!
Our step-by-step guide to drawing Toothless will show you everything you need to know to recreate this classic character.
How to Draw Toothless
Step 1
We’ll start this tutorial by drawing Toothless from his head. Its head is round and thin, with large, thin ears that stick back.
Small spikes then protrude from the top and sides of its head. Finish with his eyes near the front of his face, and then we can continue!
Step 2
We continue with this toothless drawing and add the beginning of his back. It has a series of large, rounded spikes on its back that you can draw with some curved lines.
Next, use more curved lines for the base of his wings, which we’ll draw in this guide’s next few steps!
Step 3
This character has relatively small wings, and we will draw them in this step of our guide on how to draw Toothless.
These will connect to the wing pieces you started in the previous step and right on the back.
The wings are small and rather rounded, with curved line details extending inside the wings.
Step 4
Now in this step of the guide, we will draw some legs for this Toothless drawing! Its legs are quite thick at the ends and slightly thinner at the base.
It also has a pair of sharp claws on the ends of each foot. Also, the hind legs are slightly thinner than the front legs.
After drawing his legs, let’s draw more fins near the back of his body where his tail will extend.
Speaking of the tail, we will draw it in the next step of the tutorial!
Step 5
This step of our guide on how to draw Toothless focuses on the beginning of his tail. The tail is quite long, thick, and winding.
It should look like a large lizard’s tail, with small jagged spikes running down it.
It also gets thicker at the base and slightly thinner towards the tip.
Now that we’ve drawn most of the tail, we’ll finish it with some final touches in the next step of the guide!
Step 6
It’s almost time to color this image in the final phase of this Toothless drawing, but we’ll finish the final outlines first.
Once you’re done with all those details, let’s look at some ways you can add your personal touches and details to the image!
First, we finish his cock. As you can see in the reference image, large, flat fins extend down the sides of the tail.
Sharp spikes protrude into each of these fins.
Once you’ve drawn them, it’s time to put the finishing touches! Adding a background is always a good idea,; if you do, it could highlight your favorite scene or setting from the movies.
You could create a unique setting and add other movie characters to top it off.
Step 7
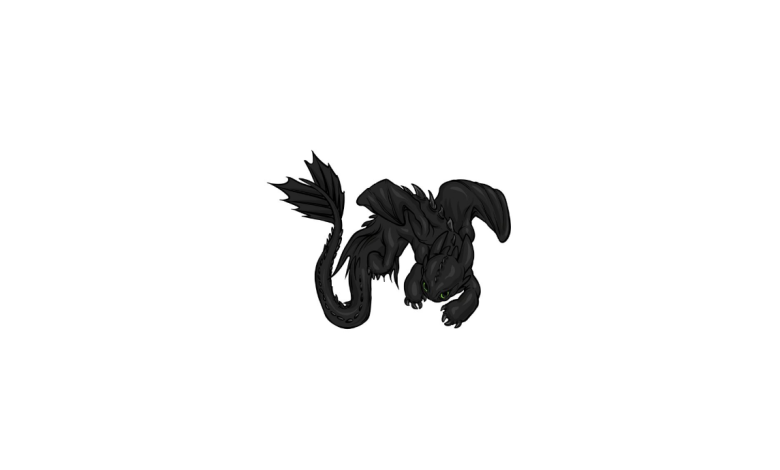
One of the distinguishing features of Toothless’ design is that he comes in a black color scheme with glowing green eyes.
We will color the picture in this step of our Toothless Drawing guide! Even if you want to keep an exact color scheme on your screen, there are still ways to make it more dynamic!
By incorporating lighter tones, you can add definitions to the different parts of the body. Our reference image will show you how!
You can even create a unique variation of this character by playing with different colors and art mediums!
If we were going to colorize it, we would use watercolor paints to keep the finer details from getting lost.
Your Toothless Drawing is Finished!